PHOTO BASICS: THE MAGIC TRIANGLE PART II
March 21, 2014
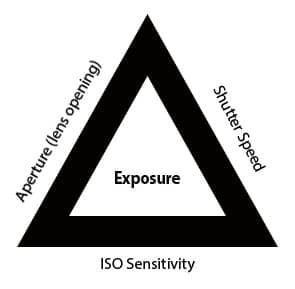
 In the last photo basics post I talked about the three parts of an exposure: shutter speed, aperture, and ISO sensitivity. Each of these three things combine to give you an exposure or image, and each has a specific effect on how your image turns out. Let’s review:
- Shutter speed: Controls how much light is let into the camera. A fast shutter speed lets in less light and can freeze motion, a slower shutter speed lets in more light and lets motion blur.
- Aperture: Controls with opening in the lens to let in more light, and is expressed as a fraction (f/1.4, f/5.6, etc.). A large aperture lets in more light but gives you narrow depth of field (so your subject is in focus but foreground/background may not be). A smaller aperture lets in less light but gives you more depth of field.
- ISO Sensitivity: Controls how quickly your camera’s sensor can capture information. A higher ISO sensitivity can capture information more quickly (so less light is needed) but can introduce noise.
I hope you’re with me so far! The next step is to decide how all of these work together, so when you are faced with a situation you know what changes to make.
Every time you double the amount of your exposure this is called a “stop”. For example, if you increased your shutter speed from 1/250s to 1/125s this would be called increasing your exposure by a stop. So up a stop = doubling your exposure (light), down a stop = halving your exposure.
Now the Tricky Part
When you go up a stop you’re essentially doubling the amount of time (shutter speed), light (aperture), or sensitivity (ISO). If you are in semi-automatic modes that let you adjust shutter speed or aperture then you’ll notice that your camera will ‘balance’ the other settings to ensure you have a correct exposure. For example:
- You choose 1/250s for a brightly lit scene; your camera chooses ISO 100 and an aperture of f/22.
- You change your shutter speed to 1/500; your camera changes the aperture to f/16 (twice as big).
In both of these examples you still have a “perfect” exposure, as far as your light meter is concerned, but by halving your shutter speed and the amount of light coming in your camera has to double the size of the aperture.
A note about ISO: In this example your ISO stayed the same, which it should. Your camera may be set to automatically adjust your ISO (you can turn this off in your camera’s menu). Remember that you can double your ISO (or more) to capture a scene more quickly – which works well in lower-light situations or when you don’t want to use a large aperture or slower shutter speed.
Taking Control
Feel free to stay in semi-automatic mode for as long as you need too. Choose aperture priority when you want to control the depth-of-field (for portraits or landscapes, primarily) or choose shutter priority when you want to control motion (action scenes, kids running, etc.). Notice how when you change one setting your camera changes the others. Eventually, when you want complete control over how a scene looks you’ll be ready to switch to manual mode.
Good luck!